Showing posts with label blue. Show all posts

Monday, September 29, 2014

Romance in the Dining Room

Please join me over at  The Pink Pagoda for her fun and fabulous Blue & White Bash, and share in everyone's mutual love for blue & white! And check out all the participants.  Its so much fun to see what everyone is doing with their love of blue.


I worked for Laura Ashley, years ago, when the company still had shops in the US!
I was and still am, heavily influenced by the florals and romantic fabrics I was surrounded with day after day in that wee Seattle shop.

So when I finally bought my own cottage and had a chance to decorate it, I already knew just how I wanted it to look.
Soft blues and whites and romantic florals.
Influenced by Laura Ashley and Swedish Gustavian design!

So, budget allowing, I am working my way through each room.
Right now I am working on the dining room.
I love being able to design my own fabrics and wallpapers via Spoonflower.
My shop name is Lilyoake.

I chose my "Jane's Rose Stripe" for my curtains ( to be paired later with a matching wallpaper called "Jane's Rose Bouquet".)

I took some time out this past weekend to finish sewing the first curtain panel, printed on linen cotton canvas.
I edged it with a matching blue gingham I bought at a fabric shop.  I intend to line them too, with white cotton sheets, so they look more finished from the outside.
But in the mean time, I can get them up, because we need the privacy now that its dark early!


Monday, March 18, 2013

New Spring Fabrics

Heading into spring, I am beginning work on my new fabrics for 2013/Summer.
Here are my latest offerings, which can be found and purchased in fabrics, wallpaper and wall decals at Spoonflower.

I am continuing to fuel my own passion for blue & white by offering up my designs in fabrics, decals and wallpaper!

Let me know what you think of my line!  Comments are very welcome.

I would also love to hear about any ideas YOU would like to see me do in blue & white.
Coming soon:  blue & white china prints featuring my very own acrylic and watercolor paintings of china from my own extensive collection.
And many more classic English & Swedish florals, and summery stripes and plaids.

 Copenhagen Blue Summer Tartan
 Swedish Rose Trellis in Blue
 Rose Basket in Sapphire Blue
Summerhouse Rose Blue

Friday, April 29, 2011

Handmade Ribbon


Up to my nose with house projects, I haven't done a craft project in ages! My boss's birthday provided me the opportunity to get crafty and take a break from wallpapering and painting furniture.
I decided to make her several yards of handmade ribbon - something popular in the stamping world but since I'm a graphic designer who works almost exclusively on a computer, I never got into the stamping world like two of my sisters did.

But it was easy and fun to do and I might do some homemade ribbon for special holiday gifts in the future!
(the hardest part was keeping my furry helpers off the work area!)

I bought a yard of white/bleached muslin at JoAnn Fabrics and some RIT dye. After washing/drying the muslin in my regular laundry, I mixed up some of the dye in a plastic pail (wearing gloves).
I chose a denim blue because I like how it looks when faded - a more reddish-purple undertone. I did not make it full strength - used hot water and a pinch of salt - tied up the muslin into knots so it would dye uneven for an aged look, and plunged it in/out in 5 seconds.
Wrung and rinsed in cold water, then washed/dried again with a load of jeans.
Not wanting to let the dye bath go to waste, I also dyed a stained white cotton Battenburg lace tablecloth a lovely shade of faded blueberry (20 seconds in the dye bath) and a white linen blouse that was also stained (10 seconds in a weakened dye bath). It turned out a lovely shade of pale hydrangea blue!! (new life for both pieces).
The next step was to iron and then tear the strips to the width I desired (in this case, about 2" wide). I loved the torn edges look so chose to do it that way - you can also cut it with a scissors if you prefer a more polished look.
To tear, just cut a notch into the selvage and rip.
Then the sewing machine came out - it only took 10 minutes to sew the ends together!

After laying it out on plastic bags on my table, I began stamping (I bought it all on sale at JoAnns).
Once stamped, I spritzed it with a frost and shimmer fabric/paper spray and stuck on sticky-back rhinestones.

The finished yardage was rolled up on to a piece of unbleached papyrus paper and tied with a piece of white lace ribbon.
For the final touch I stuck a piece of fresh flowering rosemary underneath the ribbon!
My next ribbon will be white muslin with pink and pale green roses and romantic text!!

Thursday, December 30, 2010

Dreams of a Vacation


It happens every year for me, about this time. Christmas is over, the new year upon us and I start to get spring fever. My cats already have it - they have been racing through the house at break-neck speeds, springing up and over furniture. I hear meowling (half meow-half howl) coming from the windowsills as flicking tails part the curtains.
I feel like meowling myself right now!
The arrival in the mail of the new Jung's seed catalog isn't helping - I am planning to get that new hydrangea on the cover...

I could use a vacation but none are in sight for me. Still, I can dream!
If I could be on my way any where right now, it would be the French Riviera - how about you?

Here's a fun collage I put together of my dream vacation on the Riviera.

Tuesday, November 9, 2010

Cast Iron Soup Pot


Check out this deal I got at TJ Maxx last Saturday. Can you believe I passed it up, got half way home and drove back to get it, worried it was gone already? A Cuisinart 7 Qt, cast iron in the perfect shade of blue. I already made the best beef veggie stew in it. I smile every time I see it. Oh, the price was $59.99 because of a few hard to see scratches on the lid. I looked up new ones and they are twice that online. I think I scored!

Tuesday, June 29, 2010

Bedroom Redo


I have reclaimed my house from my ex-boyfriend and his daughter, who have, for the most part, moved out now.
I also decided that 6 years sleeping upstairs under the eaves in a twin sized bed, where I could only stand upright in the center 4' of the room, with inadequate lighting and cold and hot temp extremes was enough so I decided to take over his old room downstairs.
It's a nice room - not big by any means, but bigger and airier then what I had as my room for years. I can also stand upright in it - bonus!! It's also near the bathroom - and I could finally graduate to a queen sized bed! (the stairs to my old room were narrow and poky and one could only fit a twin mattress up them).

I decided to make this new room my haven - a dreamy space I look forward to retiring to each night and love waking up to each morning.
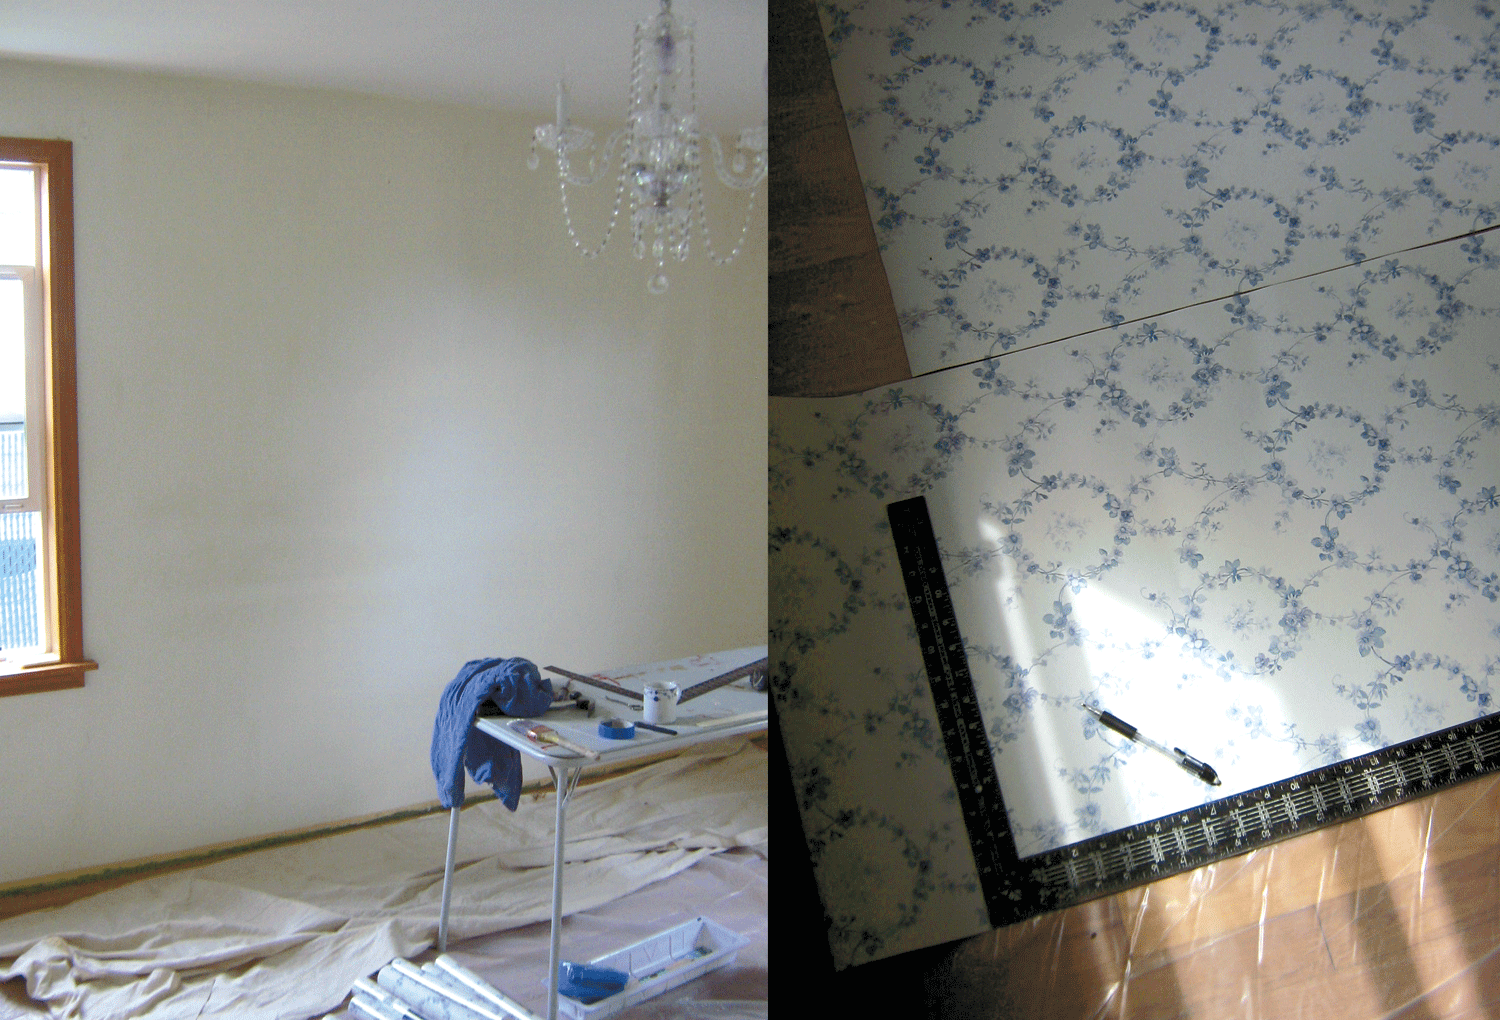
I wanted to try wallpaper for a change, instead of just paint.
I found a website called wallpapermore.com where I found some beautiful papers, some for $22 a double roll/pre-pasted. The one I chose was one of the lower priced patterns.
I found the queen sized mattress set off craigslist for $20 - this woman was moving to Hawaii and she couldn't pay over-seas shipping costs on her furniture so she was selling it all.
The queen bed frame was $95, also off craigslist. It was a hideous green so I spray painted it white.
All the bedding was found at Ross, Marshalls, TJ Maxx or eBay, at great prices!
The cotton sateen duvet in pale Delphinium blue was $30 and the Laura Ashley white cotton bedskirt with satin stripes was $14 because it had a small tear in the seam which took me 2 minutes to repair! The RL white cotton blanket was $19.99 and the queen down-alternative comforter was $39. Each paycheck, since March, I shopped for a few more items, in anticipation for the day when I could claim the room as my own and get to work on it.

I gave myself one weekend to get the wallpaper up. Having never done it before, I was a bit nervous but knew it had to be done in order to create this special haven I saw in my mind's eye.
The few supplies I needed were under $20 at Lowes and I was ready to go!
I painted wallpaper primer on the walls the Friday night before the big work weekend.

By Sunday night, 8 pm, I had finished the last piece. I had to measure and cut to go around 2 windows and 2 doors and was lucky to be vertical and alert after 2 graveyard shifts at my weekend job, 8 hours of sleep total for the entire weekend and hours on my feet each afternoon and partial evening, hanging wallpaper. I also had a really interesting hairdo from the pasted wallpaper flopping down on to my head all the time - it would pretty much keep any shape I wanted! My goal was to have the room ready for me to sleep in Sunday night and to be on the couch by 9 pm to watch Masterpiece Theater on PBS!

Well, it was 9:30 pm and I finally sat down. The wallpaper was up and trimmed away from mouldings and floors, the bed was put together and made, the bedside table I had hand painted a few months back (see earlier blog post) was in place and the settee from the living room was pushed around the corner and on to the north bedroom wall.
I dug out 2 matching glass lamps from storage I had bought from the Target Simply Shabby Chic line years ago, along with the matching curtains in British Rose and will use them in the room until I can afford something better.
The chandelier was hung a few months back and put on a dimmer. The glass chandelier was a real bargain - 17" four-arm from the website: greatchandeliers.com.
Henry was the first one on the bed. He was exhausted from watching me scrambling all weekend! The other kitties also came and poked around, exploring the new space.

Yet to come: egg and dart crown and new baseboard, painting the window trim white, polished brass switch plate and outlet covers, adding some artwork and another bedside table (which is being painted white right now - an old, shabby wicker side table)
I'll post updated images as the room progresses.
I hope you enjoy the pictures - some were taken that Sunday night and the others the next morning. I threw in a couple of "before" images so you could see the empty room.
I was shooting for a mix of Gustavian, Shabby Chic and country. I think I nailed it!