Sunday, December 20, 2009
3D Star Ornament
Merry Christmas everyone! I have at last produced the 3D star template for you to download and create with. I made mine with a blue toile pattern on paper cardstock - choose any pattern you like and decorate any way you choose. I scanned a piece of wrapping paper, colorized it in Photoshop and reprinted it on to my choice of paper. In this case I used Conqueror's Diamond White 80# card stock. It is a clean white, smooth surface to show off colors and the paper folds and creases without cracking or splitting. You can buy reams of this paper at The Paper Zone. I kept my stars simple with some white glitter edges and rhinestones on each star tip and in the center. The pattern/template needs to be copied on to the back of your paper because t involves quite a few score lines. Where the score lines follow to the tip of each star point, these get folded as mountain folds (when the fold sticks skyward) and the scores between the points get folded valley-style (dipping in). Follow my photos for reference if you get confused.
Enlarge/reduce the template on the copier to suit the size you desire. The tabs get folded inward and glued to the inside of the other piece. You will have to cut 2 pieces to complete one star so it has a front and a back. I also used a thin white silk ribbon embroidery ribbon to hang the star but you can use any kind of ribbon or even metallic thread. If you do not choose to hang them, but perhaps display them in a dish, etc., don't use anything. Enjoy and have a wonderful holiday season. As soon as I change out of my jammies, I'm off to a party at a friend's house and I intend to take these stars as a gift for her tree.
Sunday, December 6, 2009
Favor Boxes
I would like to share these small favor box die lines with you. They can be any size you want, as long as you can fit them on to a sheet of paper through your printer. I made mine 2x2x2 in 4 patterns: a Blackwatch tartan, a Stewart tartan, a red and white plaid and a Swedish folk art pattern in red and white. I also included the plain die line in case you want to print in on to your own patterned paper.
For best results, print it on to the reverse of the patterned paper so you can easily see the score and cut lines. Have fun with it - use it for party favors or small holiday gifts.
For an added festive touch, I edged mine all with a gold leafing pen.
Score lines and slit the "U" shaped opening on the 2 bottoms so the tabs can slide into them to close the bottoms.
Do a sample one first so you understand it's construction.
Let me know if it was useful and I can then provide some newer ones for Valentines Day coming up.
Wednesday, December 2, 2009
O Christmas Tree!
O Christmas tree! O Christmas tree! Thy leaves are so unchanging! (could it be because you are an artificial tree?) hahaha O Christmas tree! O Christmas tree! Not only green when summer's here, But also when 'tis cold and drear. O Christmas tree! O Christmas tree! Thy leaves are so unchanging.
Labels:
blue and white,
Christmas tree,
Delft,
lights,
ornaments,
red,
tree,
winter
Wednesday, November 25, 2009
Christmas Gift tags
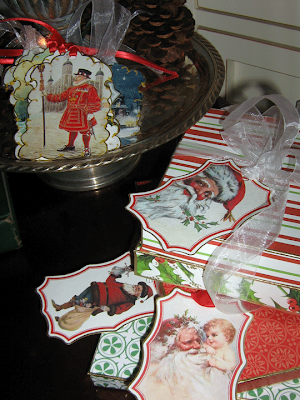
I enjoyed designing these holiday gift tags and I hope you enjoy downloading and using them on your packages this year!
I added details and magic with glitters and a gold leafing pen.
There's no accounting for colors when you take the image on to the web and then download it elsewhere - might have to adjust color on your end - same with size!
The tags are all within 3" x 4" or there-abouts but make them whatever size you prefer.
Sunday, November 22, 2009
Heavenly Angels
As promised, here are some copyright free Christmas images. I decided to post them by category and "A", for angels, seemed a good place to start.
Again, download them for use on whatever tickles your fancy.
I think the angels with white space around them would make great die cut gift tags or tree ornaments!
I had a rough schedule this weekend with work and volunteer work/very little sleep so I am unable to post the gift tags I wanted to post. I will work on doing that tomorrow after I get home from work.
I hope you are all able to use these images and projects I'm posting, to make your holiday more fun and special.
Enjoy!
Wednesday, November 18, 2009
Gold Leaf Details
Sometimes I feel I'll never get this table done! Here is the final step before I can call it done and set it on the ground (off the card table it is currently elevated on so I can work on it eye level) and use it for breakfast, reading or more likely, a cat perch in the window. Gold leaf details. I bought the faux nailhead trim from doityourselfchic.com - it comes white, flexible and ready to mold on to your project. Zap it in the microwave for 10 seconds to soften it and then glue it on. I first painted the areas to be gilded with a yellow ochre primer used in gold leafing. The gold leaf I am using is the composite leaf which is more affordable. But since it is not all gold, it will tarnish over time unless coated with a lacquer. All you do is coat the surface you want gold leafed with a quick sizing glue - let it dry for an hour or so and then apply the leaf. The photo I took was before I had a chance to smooth the leaf out so it looks rough. Once dry, take a brush and gently sweep away the loose gold that did not adhere to sizing and smooth down what is left and you're left with a little gilded glam on your piece. I love Swedish Gustavian design and a piece of white furniture with a little gilded detail on it speaks to me and I offer it up as my own version of Gustavian.
Scalloped Gift Cones
I am in the mood for Christmas and the handmade gift making has begun. I promised I'd post a free template Thursday of this week - well, I'm a day early because the potluck I thought I was going to this Friday was actually for Thursday. So here it is, a day early. I included a couple of free patterned cones too in case you liked them. Simply download the template I provide here, copying it off to a size you prefer. Print it on to a piece of patterned paper you buy from a craft/art shop or add your own pattern if you are more graphically inclined. I use 80# silk laid card stock from Wausau Paper in bright white - but you can print it on to anything you can get to go through your own printer. There are very faint scoring guidelines outside the main blue dieline from the bottom point going up to the left and right. Score these two lines and fold outward - it forms a flap which you can either hole punch and tie together for a looser cone or glue first, then hole punch and tie a ribbon through for a tighter hold. I edged mine in a gold pen - use silver, bronze, colored or none - whatever you prefer. You might even want to glitter part of your image if you print the template on to your own patterned paper. Fill them with candies, small gifts or whatever you prefer. The template can be used for other holidays and occasions too such as birthdays, Valentines Day, wedding showers, Halloween, etc. Have fun with it!!
Subscribe to:
Posts (Atom)